sram guide t brakes
SRAM Guide T Brakes: A Comprehensive Guide
SRAM Guide T brakes offer reliable stopping power, utilizing DOT 5.1 fluid. These brakes require specific maintenance, and understanding their components is crucial for optimal performance and rider safety.
SRAM Guide T brakes represent a solid entry point into hydraulic disc brake technology, favored by mountain bikers seeking dependable performance without a premium price tag. Introduced as a more affordable option within the Guide series, they deliver consistent stopping power suitable for a wide range of riding conditions.
These brakes utilize DOT 5.1 fluid, a crucial aspect to remember for maintenance and compatibility. Unlike mineral oil systems, DOT 5.1 requires careful handling due to its corrosive nature. The Guide T’s simplified lever design, lacking the bite point and reach adjustments found in higher-end models like the RSC, necessitates an allen key for reach adjustments.
Despite their streamlined features, the Guide T brakes provide reliable modulation and control, making them a popular choice for both trail and all-mountain riding.
Understanding SRAM DOT 5.1 Fluid
SRAM utilizes DOT 5.1 fluid in its Guide T brakes, a glycol-ether based brake fluid known for its high boiling point and efficient performance. This characteristic is vital for maintaining consistent braking power, especially during demanding descents where brake temperatures rise significantly. However, DOT 5.1 is also hygroscopic, meaning it readily absorbs moisture from the air.
Moisture absorption degrades performance, leading to a spongy brake feel and reduced stopping power. Regular brake bleeding is therefore essential to remove contaminated fluid and maintain optimal braking.
DOT 5.1 is incompatible with mineral oil systems; mixing them will cause seal failure and compromise brake function. Always handle DOT 5.1 with care, as it can damage paint and surfaces.
DOT 5.1 vs. Mineral Oil
DOT 5.1 and mineral oil represent fundamentally different hydraulic brake fluid types. DOT 5.1, used in SRAM Guide T brakes, is glycol-ether based, boasting a higher boiling point, crucial for resisting brake fade during intense use. Mineral oil, favored by Shimano and others, is petroleum-based and less prone to paint damage.
A key distinction lies in compatibility: DOT 5.1 and mineral oil are not interchangeable. Using the wrong fluid will destroy the brake system’s seals. Mineral oil systems require mineral oil, and DOT 5.1 systems demand DOT 5.1.
Mineral oil is less hygroscopic, but DOT 5.1 offers superior performance under extreme heat.
Importance of Fluid Compatibility
Fluid compatibility is paramount when servicing SRAM Guide T brakes. These brakes are specifically designed for DOT 5.1 fluid, and introducing mineral oil will cause catastrophic failure. The differing chemical compositions lead to seal swelling and degradation, resulting in complete loss of braking power and requiring a full system overhaul.
Using incorrect fluid isn’t a simple fix; it necessitates replacing all seals, hoses, and thoroughly flushing the entire brake line. This is a costly and time-consuming process. Always double-check the fluid type before any maintenance or bleeding procedure to avoid irreversible damage.
SRAM Guide T Brake Components
SRAM Guide T brakes feature a simplified design focused on performance and affordability. Key components include the lever assembly, caliper, brake pads, and rotor. The lever utilizes a stripped-back master cylinder, requiring an allen key for reach adjustment, unlike higher-end models with integrated dials.
The caliper houses pistons responsible for clamping the pads against the rotor. Piston sizes vary, influencing braking power and modulation. Proper function relies on the compatibility of all parts and the correct DOT 5.1 fluid. Regular inspection of these components is vital for safe operation.
Lever Design and Features
The SRAM Guide T lever prioritizes function over complex adjustability. It boasts a low-frills master cylinder, omitting the reach and bite point adjustment dials found on the RSC version. Lever reach is adjusted using an allen key, offering a basic level of customization.
Despite its simplicity, the lever provides a solid, reliable feel. Hood position can be adjusted for optimal ergonomics. Upgrading to RSC levers is a common modification for riders seeking finer control over braking parameters, specifically bite point adjustment. The lever’s design contributes to the brake’s affordability.

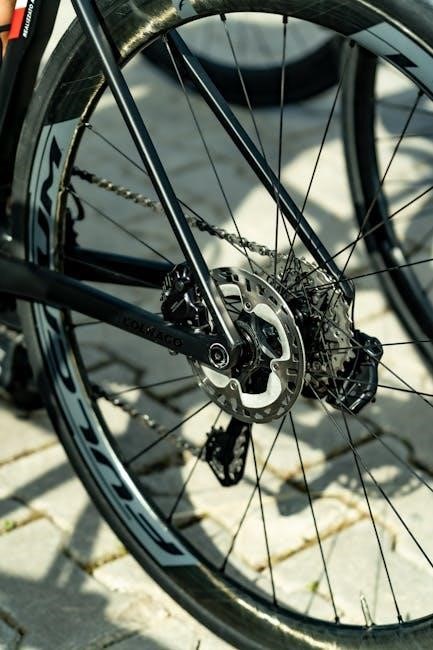
Caliper Construction and Piston Sizes

The SRAM Guide T caliper is built for consistent performance and durability. While specific details regarding piston sizes vary, understanding their impact is key. Different piston configurations influence braking power and modulation. The caliper’s construction focuses on providing reliable stopping power without excessive weight.
The cylinder-piston sizes on various brake models impact engagement and feel. Though the Guide T doesn’t offer the same adjustability as higher-end models, its caliper design delivers dependable braking. Proper maintenance, including regular cleaning and pad replacement, ensures optimal caliper function.
Installation of SRAM Guide T Brakes
Proper installation of SRAM Guide T brakes is vital for safe and effective performance. Begin by carefully mounting the lever onto the handlebar, ensuring comfortable reach and braking angle. Hand-tighten mounting bolts with a T25 Torx wrench before final adjustments.
Slide the brake lever onto the handlebar and position it for easy access. Tighten the clamp bolts to SRAM’s recommended torque specification (4-6Nm). Ensure the caliper is correctly aligned with the rotor to prevent rubbing. Double-check all bolts are secure before test riding.
Handlebar Mounting and Lever Positioning
Handlebar mounting and lever positioning significantly impact braking control with SRAM Guide T brakes. Prioritize a comfortable and ergonomic setup for optimal reach and modulation. Slide the lever onto the handlebar, experimenting with angles to find the most natural hand position.
Ensure sufficient clearance for controls and cables. Tighten the clamp bolts gradually, alternating between sides to maintain even pressure. Aim for a braking angle that allows for effortless lever pull without straining your fingers. Proper positioning enhances control and confidence on the trails.
Torque Specifications for Mounting Bolts
Precise torque is critical when mounting SRAM Guide T brakes to prevent damage and ensure reliable performance. Hand-tighten the mounting bolts initially with a T25 Torx wrench before applying final torque. SRAM recommends a clamp bolt torque specification of 4-6 Nm (Newton meters) for secure lever attachment.
Caliper mounting bolts should also be tightened to the manufacturer’s specification, typically around 8-10 Nm. Using a torque wrench is highly recommended to avoid over-tightening, which can strip threads or damage components. Consistent torque application guarantees optimal braking power and safety.
Adjusting SRAM Guide T Brakes
SRAM Guide T brakes require careful adjustment for optimal performance. The standard Guide T lever necessitates an allen key for reach adjustment, lacking the bite point dial found on higher-end models like the RSC. Addressing engagement point issues often involves upgrading to Guide RSC levers for precise control.
Alternatively, products like Carbon Fiber Deslackinators offer a solution for fine-tuning the engagement point without lever replacement. Proper adjustment ensures the brakes engage quickly and effectively, maximizing control and rider confidence on the trails.
Lever Reach Adjustment (Allen Key Method)
SRAM Guide T brake levers utilize an allen key for reach adjustment due to their simplified design. Locate the small set screw on the lever blade – typically accessible from the side. Loosening this screw allows the lever blade to move closer or further from the handlebar.
Turning the screw clockwise decreases reach, bringing the lever closer, while counter-clockwise increases it. Adjust incrementally, testing brake feel after each adjustment. Ensure the screw is securely tightened once the desired reach is achieved, preventing unwanted movement during rides.
Bite Point Adjustment (Guide RSC Lever Upgrade)
SRAM Guide T brakes lack native bite point adjustment. However, upgrading to Guide RSC levers solves this issue. RSC levers feature a dedicated adjustment dial, allowing riders to fine-tune when the brakes engage during the lever pull.
This adjustment impacts modulation and power. Turning the dial inward decreases the bite point, engaging the brakes sooner with less lever travel. Outward increases it, requiring more lever pull for engagement. This upgrade provides greater control and customization, addressing complaints about the Guide T’s initial engagement distance.
Addressing Engagement Point Issues
SRAM Guide T brakes are often criticized for a distant engagement point, requiring significant lever travel before braking force is applied. While the Guide T itself lacks adjustment, solutions exist. Upgrading to Guide RSC levers is a popular fix, introducing a bite point adjustment dial for customization.
Alternatively, Carbon Fiber Deslackinators offer a more affordable solution. These spacers, installed within the lever, effectively reduce the volume, bringing the engagement point closer to the handlebar. Both methods aim to improve responsiveness and control, addressing the common complaint of delayed braking feel.
Carbon Fiber Deslackinators for Adjustment
Carbon Fiber Deslackinators present a cost-effective solution for adjusting the engagement point on SRAM Guide T brakes. These small spacers are installed within the brake lever, reducing the internal volume and effectively shortening the stroke to the rotor.
This modification brings the bite point closer to the handlebar, resulting in a more responsive and controlled braking feel. They are particularly useful for riders dissatisfied with the Guide T’s factory engagement point. Installation is straightforward, offering a noticeable improvement without the expense of a full lever upgrade to the Guide RSC model.

Maintenance of SRAM Guide T Brakes
SRAM Guide T brake maintenance centers around the DOT 5.1 hydraulic fluid. Regular bleeding is essential, as DOT 5.1 absorbs moisture, leading to spongy brake feel and reduced performance. Inspecting and replacing brake pads is also crucial, ensuring consistent stopping power and preventing rotor damage.
Rotor maintenance involves cleaning to remove contaminants and checking for wear. Proper torque specifications for mounting bolts are vital for safe operation. Consistent maintenance extends the lifespan of the brakes and guarantees reliable performance on the trails, maximizing rider confidence and safety.
Bleeding SRAM Guide T Brakes
Bleeding SRAM Guide T brakes is critical due to the hygroscopic nature of DOT 5.1 fluid, which readily absorbs moisture. This process removes air bubbles and contaminated fluid, restoring optimal braking performance. A clean workspace and proper technique are essential to avoid introducing new contaminants.
Specialized bleeding kits are available, simplifying the procedure. Following SRAM’s official bleeding guide is highly recommended. Regular bleeding, typically every six months depending on usage, maintains a firm lever feel and prevents performance degradation. Ignoring this maintenance can lead to a spongy feel and reduced stopping power.
Pad Replacement Procedures
Pad replacement on SRAM Guide T brakes is a straightforward maintenance task, crucial for maintaining braking performance. Begin by removing the wheel and carefully inspecting the pad wear. Use a clean cloth to wipe away any debris. Remove the retaining clip and slide out the old pads, noting their orientation.
Install the new pads, ensuring they are correctly seated and the clip is securely fastened. Bedding in the new pads is vital; perform several controlled stops from moderate speeds to transfer brake material onto the rotor. Regular pad checks prevent damage to rotors and maintain consistent stopping power.
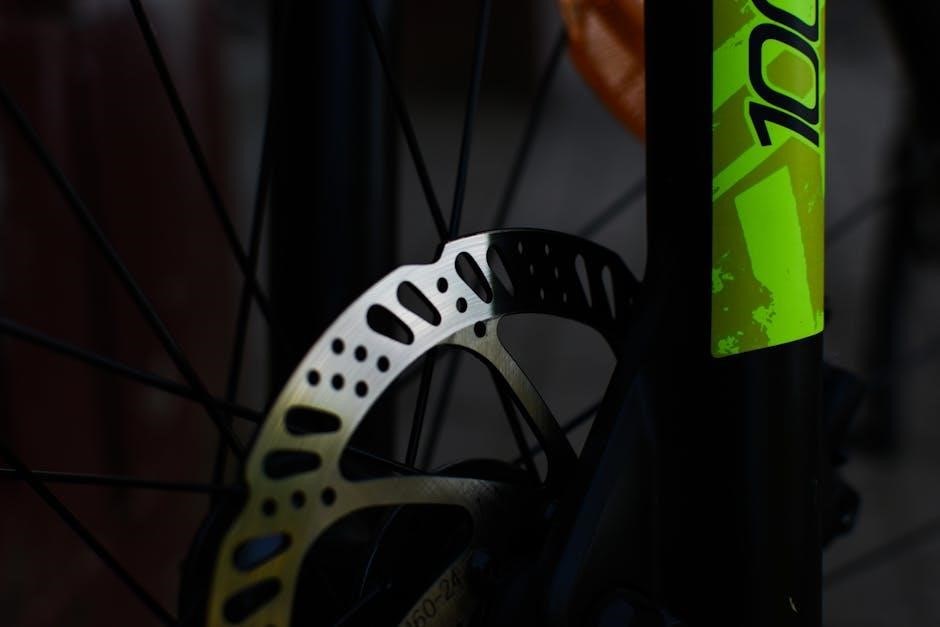
Rotor Compatibility and Maintenance
SRAM Guide T brakes are compatible with various rotor sizes and types, though proper maintenance is key. Regularly inspect rotors for wear, warping, or contamination. Clean rotors with isopropyl alcohol to remove brake fluid or oil, ensuring optimal friction. Avoid touching the rotor surface with bare hands.
Warped rotors can cause brake noise and reduced performance, requiring replacement or truing. Consider upgrading to larger rotors for increased stopping power, especially for aggressive riding. Proper rotor care extends their lifespan and ensures consistent braking, complementing the Guide T’s hydraulic system.
Troubleshooting Common Issues
SRAM Guide T brakes can experience issues like loss of power, often due to air in the system or low DOT 5.1 fluid levels – requiring a bleed. A spongy feel indicates air contamination, demanding immediate attention. Brake noise and vibration can stem from contaminated rotors or worn pads.
Engagement point problems, a common complaint, may necessitate a Guide RSC lever upgrade for bite point adjustment. Products like Carbon Fiber Deslackinators can also address this. Always ensure fluid compatibility; never use mineral oil with DOT 5.1 systems. Regular inspection and maintenance prevent these issues.
Loss of Brake Power
SRAM Guide T brake power loss is frequently linked to air entering the hydraulic system. This diminishes the fluid’s ability to transmit force effectively. Another common cause is a low DOT 5.1 fluid level, impacting hydraulic pressure; Contaminated fluid can also reduce braking performance, requiring a complete flush and refill.
Inspect brake lines for leaks or damage. A thorough bleed, following SRAM’s procedure, is often the first step in restoring power. Ensure proper pad contact with the rotor. If issues persist, check the master cylinder and caliper for internal problems.
Spongy Brake Feel
A spongy brake feel in SRAM Guide T brakes typically indicates air within the hydraulic system. This compressibility of air absorbs pressure, resulting in a less firm lever pull. Contamination of the DOT 5.1 fluid can also contribute to this issue, reducing its efficiency.
Bleeding the brakes is the primary solution, removing air bubbles and restoring hydraulic pressure. Inspect for leaks around the caliper, lever, and hose connections. Ensure the fluid reservoir is adequately filled. If bleeding doesn’t resolve the problem, consider a potential master cylinder or hose issue.
Brake Noise and Vibration
Brake noise and vibration with SRAM Guide T brakes can stem from several sources. Rotor contamination—oil, dirt, or cleaning agents—is a common culprit, causing squealing or grinding sounds. Uneven rotor wear or warping can also induce vibrations felt through the handlebars.
Ensure rotors are clean and true. Bedding in new pads properly is crucial to minimize noise. Check pad alignment and replace them if worn unevenly. Inspect the caliper for proper mounting and piston movement. Sometimes, a slight adjustment to the caliper position can eliminate unwanted vibrations.
SRAM Guide T vs. Other SRAM Brake Models
SRAM Guide T brakes represent a more budget-friendly option within the SRAM lineup. Compared to the Guide R, the Guide T lacks the bite point adjustment feature, offering a pre-set engagement point. The Guide RSC provides superior adjustability with its RSC lever, allowing for both reach and bite point customization.
The Guide T prioritizes simplicity and affordability, while the R and RSC models cater to riders seeking more refined control. Upgrading to an RSC lever is a popular modification for Guide T owners desiring bite point adjustment.
Guide T vs. Guide R
SRAM Guide T and Guide R brakes share core components, delivering consistent stopping power, but differ in key features. The primary distinction lies in adjustability; the Guide R, while still relatively basic, offers a slightly more refined lever feel. However, both models utilize DOT 5;1 fluid, demanding careful handling and compatibility considerations.
The Guide T prioritizes affordability, omitting the bite point adjustment found in higher-end models. Riders seeking greater control and customization often opt for the Guide R, or consider upgrading a Guide T with RSC levers.
Guide T vs. Guide RSC
SRAM Guide T brakes represent an entry point, while Guide RSC models offer significant enhancements, particularly in adjustability. The RSC levers introduce both reach and bite point adjustments, allowing riders to fine-tune braking feel for optimal control. This is a crucial difference, as the Guide T requires an Allen key for reach adjustment only.
Both utilize DOT 5.1 fluid, but the RSC’s added features justify the price increase for riders prioritizing customization. Upgrading a Guide T to RSC levers is a common modification to gain that bite point control.

Upgrading SRAM Guide T Brakes
Upgrading SRAM Guide T brakes primarily centers around the levers and rotors. The most popular upgrade is swapping to Guide RSC levers, gaining crucial bite point adjustment functionality. This eliminates the need for Carbon Fiber Deslackinators for engagement point modification. Rotor upgrades can improve braking power and heat dissipation, especially for aggressive riding.
Consider larger rotor sizes for increased stopping power. Remember to maintain DOT 5.1 fluid compatibility with any upgrades. These modifications enhance performance and tailor the brakes to individual rider preferences.
Lever Upgrades (RSC)
Upgrading to SRAM Guide RSC levers is a significant improvement for Guide T owners. The primary benefit is the addition of bite point adjustment, addressing complaints about excessive lever travel. Unlike the Guide T’s simple design requiring an allen key for reach adjustment, the RSC offers on-the-fly control.
This eliminates the need for aftermarket solutions like Carbon Fiber Deslackinators. The RSC levers maintain DOT 5.1 fluid compatibility, crucial given SRAM’s fluid choice. This upgrade provides a more refined and customizable braking experience, enhancing control and confidence on the trail.

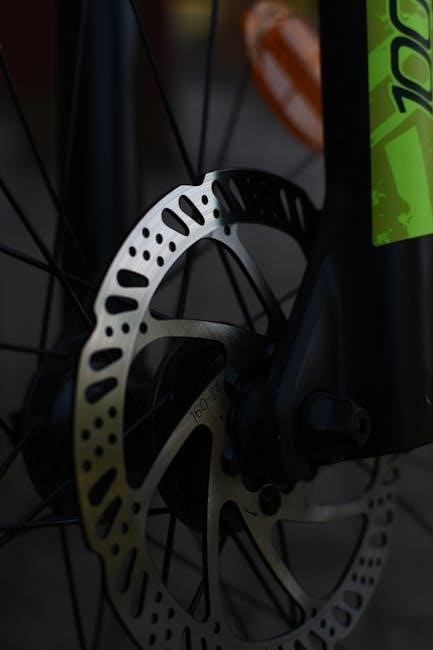
Rotor Upgrades
Upgrading rotors paired with SRAM Guide T brakes can significantly enhance braking performance. Larger diameter rotors, such as 203mm or 220mm, provide increased stopping power and better heat dissipation, crucial for extended descents. Consider SRAM Centerline or SRAM HS2 rotors for optimal compatibility and performance.
Rotor material also plays a role; steel rotors are durable and affordable, while carbon fiber rotors offer weight savings. Regular rotor maintenance, including cleaning and truing, is essential for consistent braking. Ensure the new rotors are compatible with the Guide T’s caliper mounting style.
SRAM AXS Brake Lever Reach Adjustment
While the SRAM Guide T utilizes mechanical levers adjusted with an allen key, upgrading to SRAM AXS introduces electronic reach adjustment. AXS levers offer precise control via the AXS app or buttons on the shifter. Adjusting hood position also impacts reach; moving them closer to the stem effectively shortens the distance to the lever.
This allows for fine-tuning without compromising braking power. Remember that AXS levers require a separate bleed kit for DOT 5.1 fluid maintenance. Proper setup ensures optimal ergonomics and braking confidence, especially for riders with varying hand sizes.
Adjusting Hood Position for Reach
For riders seeking subtle reach adjustments on SRAM Guide T brakes, manipulating the brake lever hood position offers a simple solution. Sliding the hoods inward, closer to the handlebar stem, effectively reduces the distance your fingers need to travel to engage the brakes. Conversely, moving them outward increases reach.
This adjustment doesn’t alter braking power, only ergonomics. Ensure both hoods are positioned symmetrically for balanced feel. Tighten the clamp bolts to the manufacturer’s specified torque (4-6Nm) after each adjustment to maintain secure positioning during rides.